
Zoomfer
Installing and Setting Up TG Data Capture 7
Installation. Data Capture 7 runs as a Windows service. The program must be installed with an administrator account and be used with an administrator account.
1. Download Data Capture 7 from https://www.temperatureguard.com/software if haven’t done so.
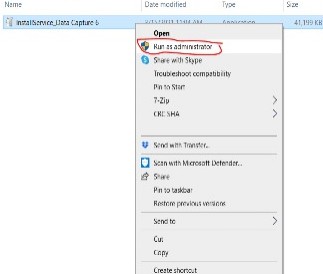
2. The download link will take you to Google Drive. To install the program, you MUST right click on the .EXE and Run as Administrator. (You will need to be an Admin user to install AND use the program.)
3. This version of Data Capture will install a Windows Service. This means that once sets up the computer only needs to be on and not in sleep mode to collect data and send alert emails and text messages. The user no longer needs to be logged in.
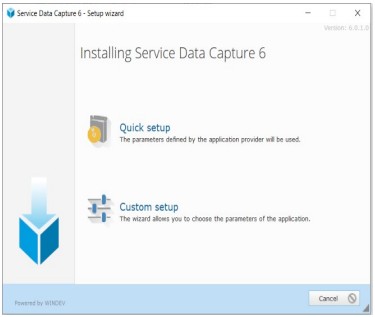
4. Follow the setup wizard. If you are installing over a previous version, the install may stop. Click the Force Application to Stop button. (Quick setup is recommended)
5. After the installation, the TG Data Capture 7 Icon should be on your Desktop.
Configuration
1. This is the place to click for first time users.
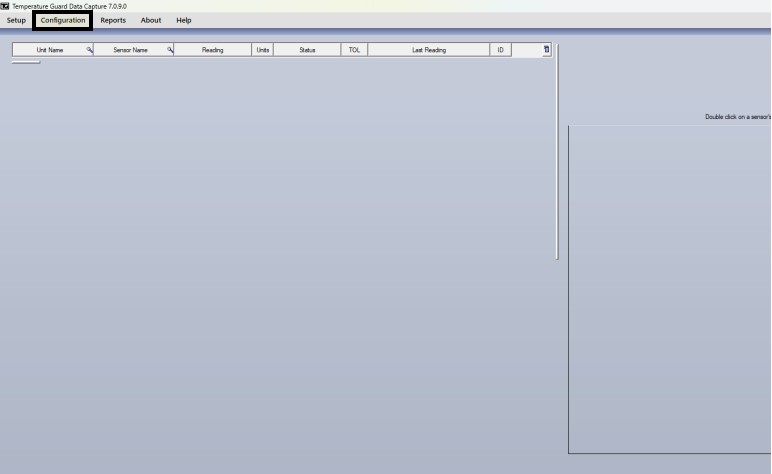
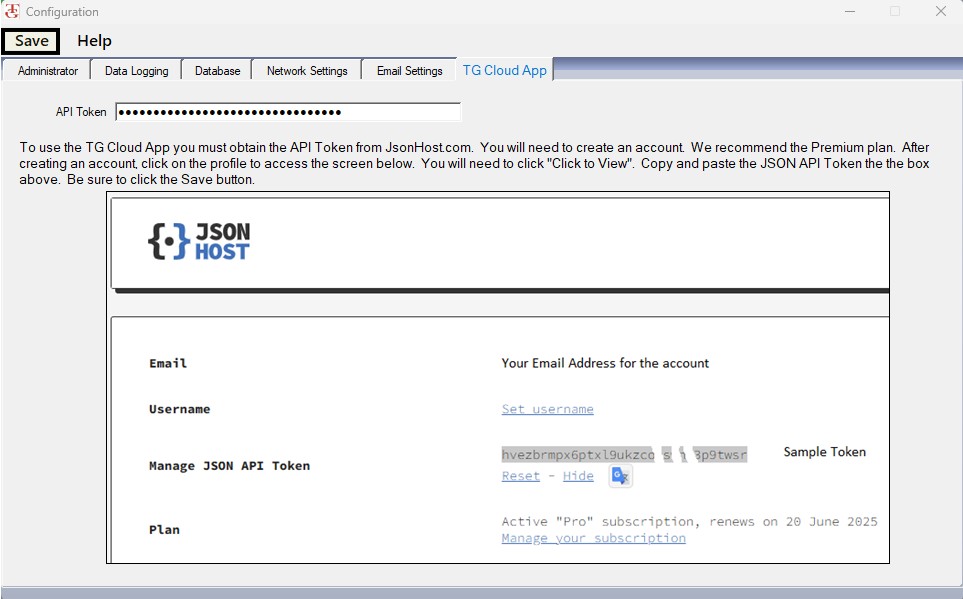
2. After clicking Configuration, click on the TG Cloud App tab:
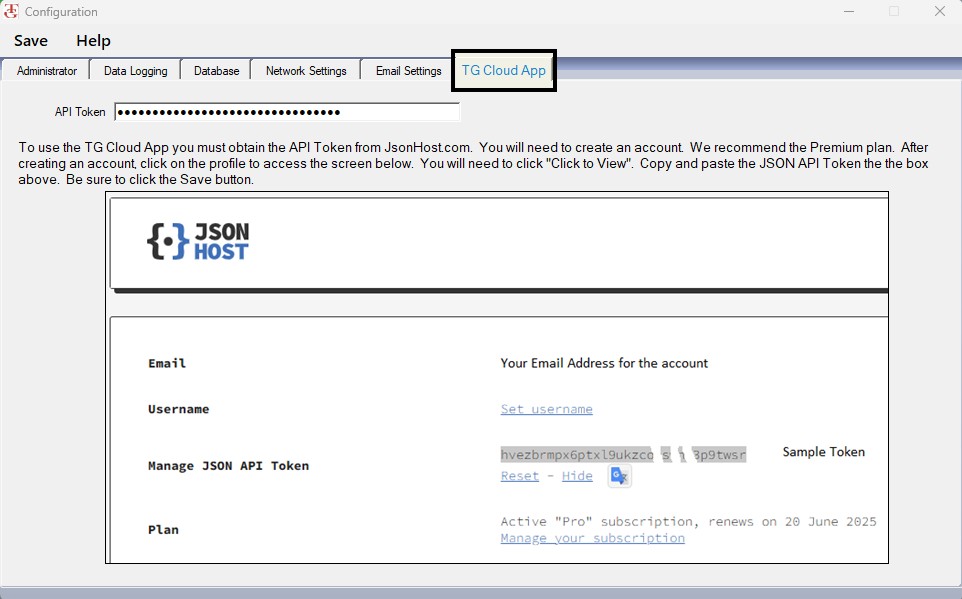
Then, paste the API Token from JsonHost.com Profile in the API Token field.
3. After pasting the API Token Code, click on Save.
Setting Up your TemperatureGuard Monitoring Device Host ID on TG Data Capture 7
1. Once you have entered the API Token, go to Setup –> Edit –> Unit and select the name (or IP) of the unit you want to use with the app.
2. Check the Allow… check box. This will automatically create a Host ID for this unit. The Host ID is needed for the iOS and Android phone app.
3. Repeat this for each unit you want to use with the Tg Cloud App.
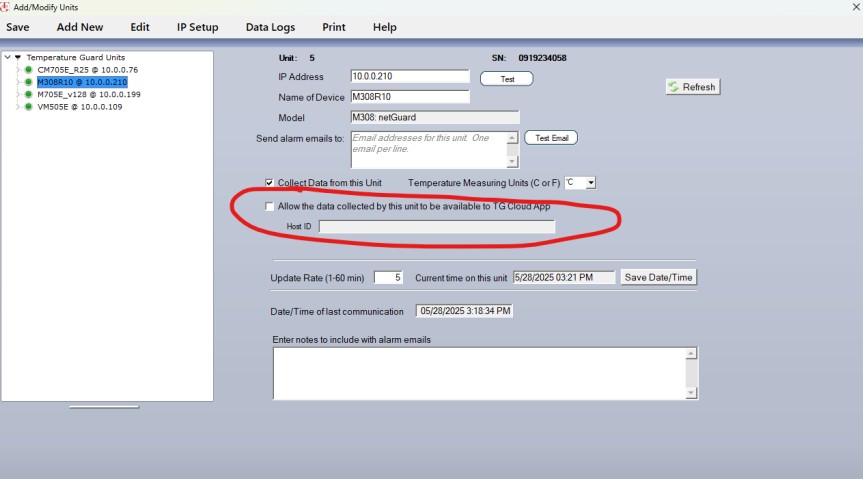
4. Be sure to click the Save button.
5. Copy it and e-mail it to yourself to paste it in the TG Cloud App; or start the TG cloud App Setup Screen and input it manually.
For the complete setup of your TemperatureGuard Device and TG Data Capture 7 please check the following Manual: Data Capture 7 Installation and User Manual